Making rustic chairs is fun and easy; it’s also a great way to use that wood you gathered for the rustic arches.
Here is some of the wood from this season. Most of it is alder but there is some cherry wood too. Alder will not last a long time but it’s easy to come by, soft and a great beginner wood. As your skill develops it’s fun to try other types.
Get your tools together; I use a drill with a forstener bit to cut my mortises, a saw and a knife for whittling the tenons. I am hoping to get a tenon cutter as the whittling can take a really long time and it’s hard to get a tight fit.
Once you have selected the pieces you want to use cut two long pieces to be the back and two short pieces to be the front. Here is what the mortise looks like.
Here is a joining piece with the tenon cut; this will go in the seat pole.
I usually use wood glue then pound some small pieces of wood in to really tighten up the joint. Green wood will shrink so using green for the large pieces of your chair and a dry wood for the joining pieces is ideal.
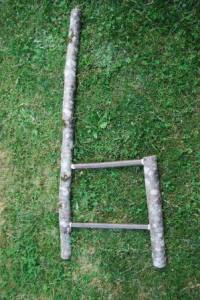
Make the two side pieces by glueing the cross pieces into your longer poles.
Once this has set for 24 hours you can join the two side pieces together. I usually put in a back rung and a piece underneath for more stablility. The fun part is decorating the back with branched wood, wire, whatever you like.
Next add a few small pieces to make triangles near the seat; this will stabalize the chair. Sometimes a few more pieces are needed under the seat as well. I usually nail these in place with a bit of glue for extra bonding. The last part is to do the seat; with this chair I have woven seagrass rope but you can use thin strips of bark, wood or other materials. I have to admit that these are not always the most comfortable chairs but they are great accent pieces.


I'd love to hear from you!